Xcode 버전 15.3 에서 iOS 앱 프로젝트를 신규로 생성한다.


Interface 에서는 Storyboard 또는 SwiftUI 둘 중 어느 한 가지만을 선택해야 한다.
Storyboard 를 선택해서 프로젝트를 생성한 결과 자동으로 만들어지는 클래스, 파일 목록은 다음과 같다.

지금부터 storyboard 를 사용하는 프로젝트의 몇 가지 특징을 나열해보겠다.
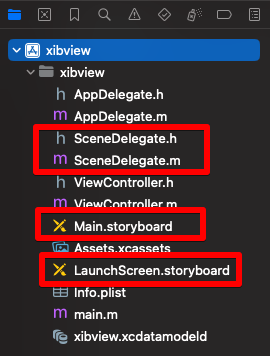
우선 파일 목록에서 SceneDelegate.h, m 파일과 storyboard 확장자를 갖는 2개의 파일이다.
그리고 설정에서 아래 항목을 발견할 수 있다.
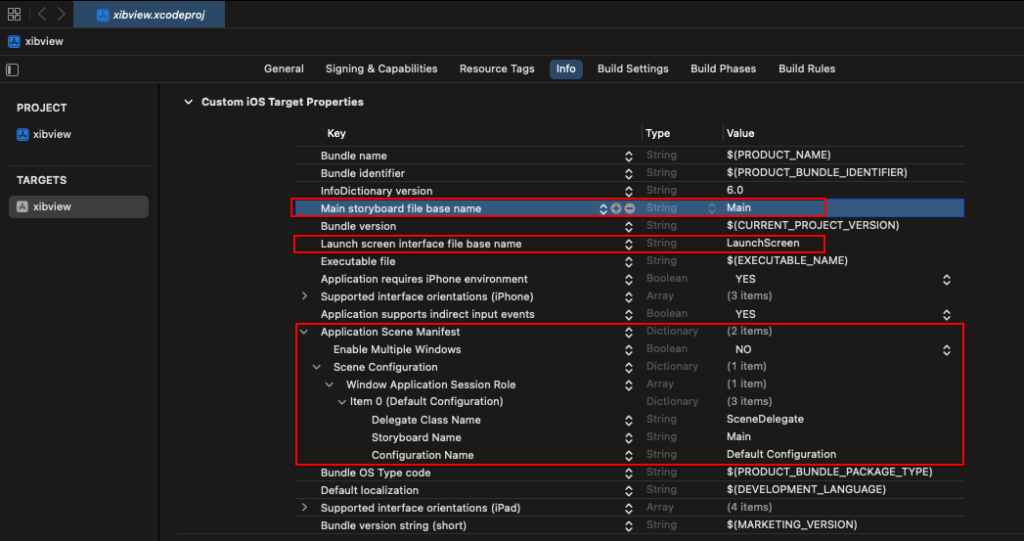
- Main storyboard file base name : Main
- Launch screen interface file base name : LaunchScreen
- Application Scene Manifest
마지막으로 AppDelegate.m 에 구현되어 있는 UISceneSession lifecycle 섹션의 코드이다.
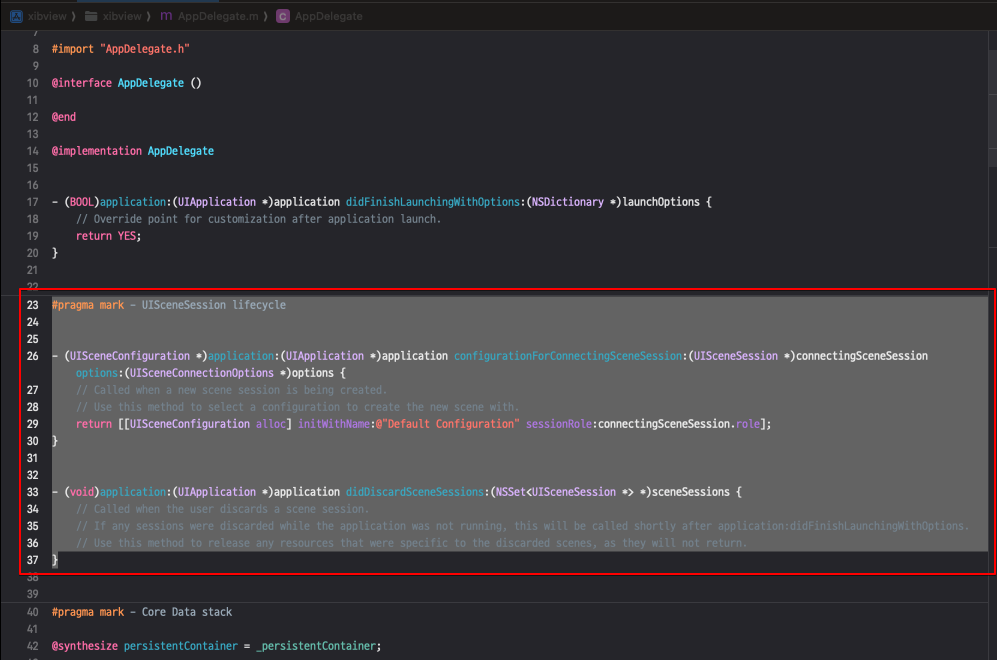
#pragma mark - UISceneSession lifecycle


- (UISceneConfiguration *)application:(UIApplication *)application configurationForConnectingSceneSession:(UISceneSession *)connectingSceneSession options:(UISceneConnectionOptions *)options {
    // Called when a new scene session is being created.
    // Use this method to select a configuration to create the new scene with.
    return [[UISceneConfiguration alloc] initWithName:@"Default Configuration" sessionRole:connectingSceneSession.role];
}


- (void)application:(UIApplication *)application didDiscardSceneSessions:(NSSet<UISceneSession *> *)sceneSessions {
    // Called when the user discards a scene session.
    // If any sessions were discarded while the application was not running, this will be called shortly after application:didFinishLaunchingWithOptions.
    // Use this method to release any resources that were specific to the discarded scenes, as they will not return.
}
위에 언급한 파일과 설정, 그리고 코드는 xib 를 사용하는 프로젝트로 변환할 때 모두 삭제할 대상이다.
가차없이 삭제해서 프로젝트를 빌드하고 실행시켜보면 아래와 같은 결과가 나타난다.
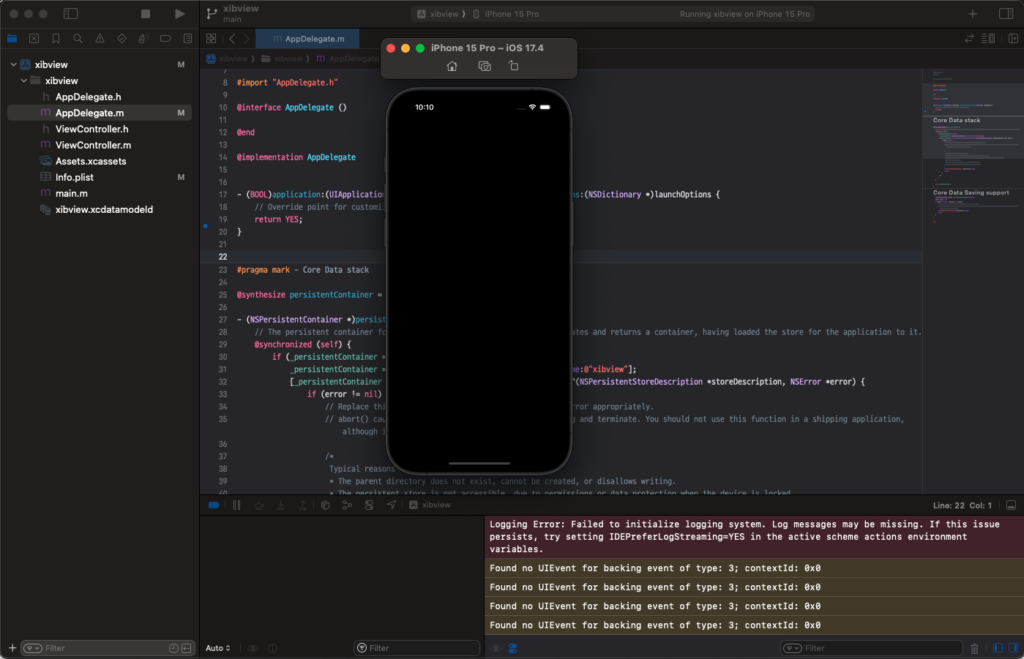
아무런 에러없이 빌드가 되지만 실행한 결과는 검은 화면 뿐이다.
그 이유는 아무런 윈도우도 설정되지 않았기 때문이다. 이제부터 윈도우를 설정하는 과정에 대해서 알아본다.
프로젝트에 Cocoa Touch Class 항목을 추가한다.

메인 뷰 컨트롤러로 사용하기 위한 추가이므로 MainViewController 라는 이름으로 명명한다.

UIViewController 를 상속받도록 선택하고, Also create XIB file 에 체크하여 xib 파일도 함께 생성되도록 한다.
생성된 MainViewController.xib 를 선택하여 View 의 배경색을 눈에 잘 띄게 오렌지색으로 변경해보자.
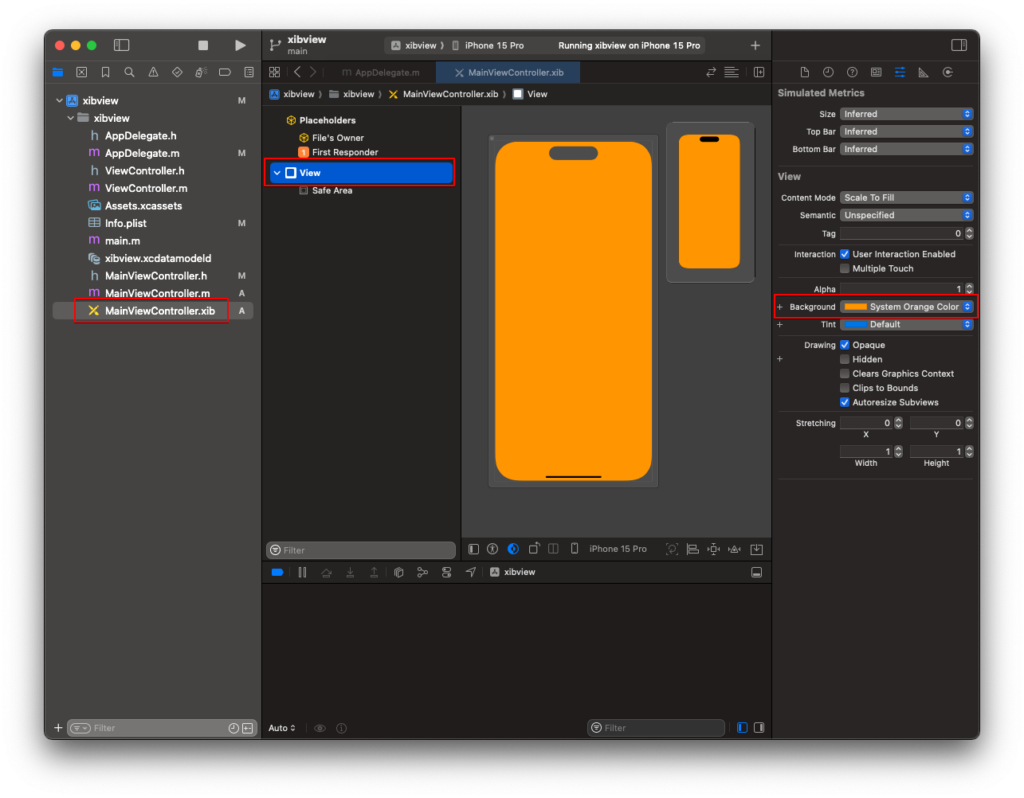
이제 앱의 메인 뷰 컨트롤러를 MainViewController 로 설정하는 코딩을 진행해보자.
코드를 추가할 곳은 AppDelegate 의 didFinishLaunchingWithOptions 함수이다.
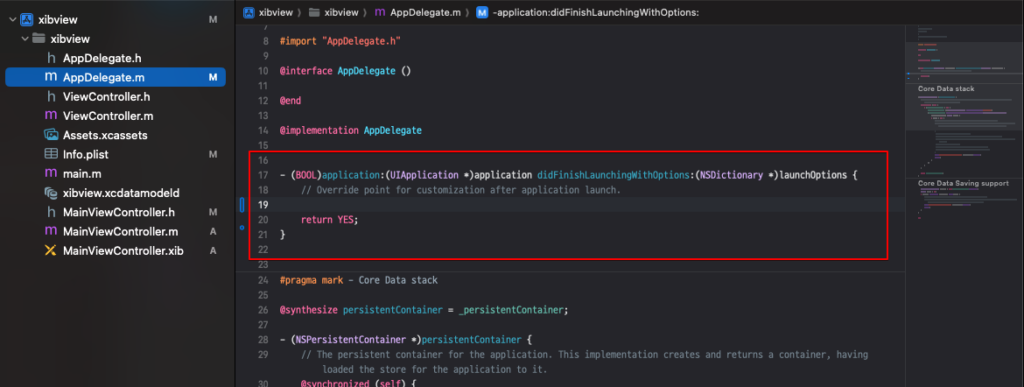
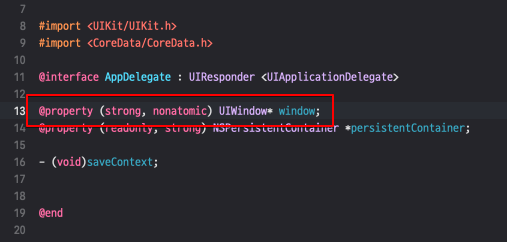
코드를 작성하기 전에 AppDelegate 에 UIWindow 타입의 window 프로퍼티를 추가하자.
#import <UIKit/UIKit.h>
#import <CoreData/CoreData.h>

@interface AppDelegate : UIResponder <UIApplicationDelegate>

@property (strong, nonatomic) UIWindow* window;
@property (readonly, strong) NSPersistentContainer *persistentContainer;

- (void)saveContext;


@end
이제 코드를 구현해보자.
- (BOOL)application:(UIApplication *)application didFinishLaunchingWithOptions:(NSDictionary *)launchOptions {
    // Override point for customization after application launch.
    self.window = [[UIWindow alloc] initWithFrame:[[UIScreen mainScreen] bounds]];

    [self.window makeKeyAndVisible];

    return YES;
}
iOS 앱은 최소한 한 개의 UIWindow 객체가 존재해야 하므로 위와 같이 생성하고, makeKeyAndVisible 함수로 키 윈도우의 자격을 부여한다.
이 상태에서 빌드하여 실행하면 아래와 같은 오류가 발생한다.
*** Terminating app due to uncaught exception 'NSInternalInconsistencyException', reason: 'Application windows are expected to have a root view controller at the end of application launch'
root view controller 를 가져야 하는데, 없어서 예외(Exception)가 발생한 것이다.
UIWindow 의 root view controller 로 MainViewController 를 생성하여 지정해보자.
#import "AppDelegate.h"
#import "MainViewController.h"

@interface AppDelegate ()

@end

@implementation AppDelegate


- (BOOL)application:(UIApplication *)application didFinishLaunchingWithOptions:(NSDictionary *)launchOptions {
    // Override point for customization after application launch.
    self.window = [[UIWindow alloc] initWithFrame:[[UIScreen mainScreen] bounds]];

    [self.window setRootViewController: [[MainViewController alloc] init]];

    [self.window makeKeyAndVisible];

    return YES;
}
이제 실행시켜보면 시뮬레이터에는 오렌지색의 뷰가 표시된다.
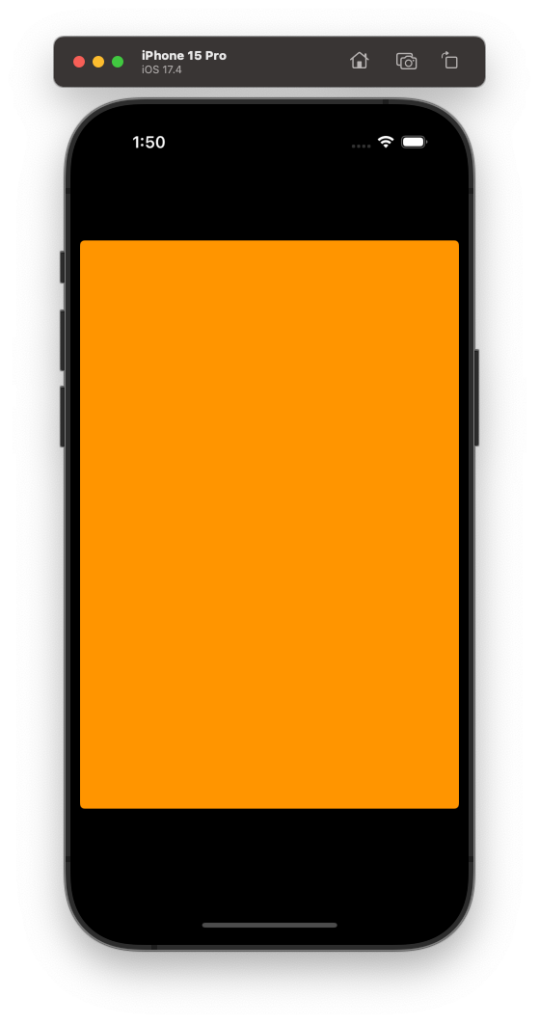
그런데, 신기하게 화면 전체 영역을 사용하지 않는다.
화면 전체 영역을 사용하게 하기 위해서는 LaunchImage 설정을 해 주어야 한다.
